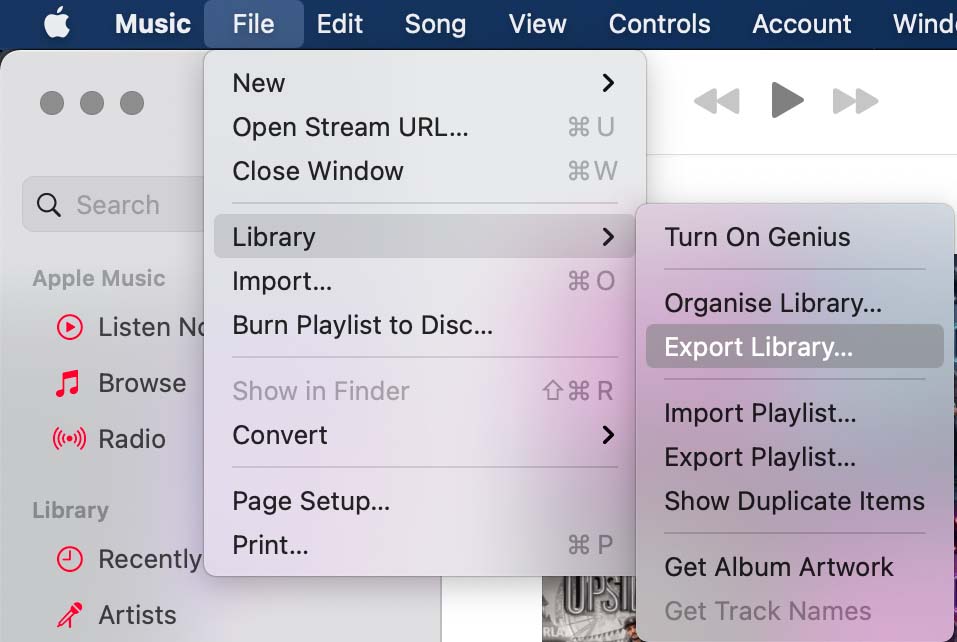
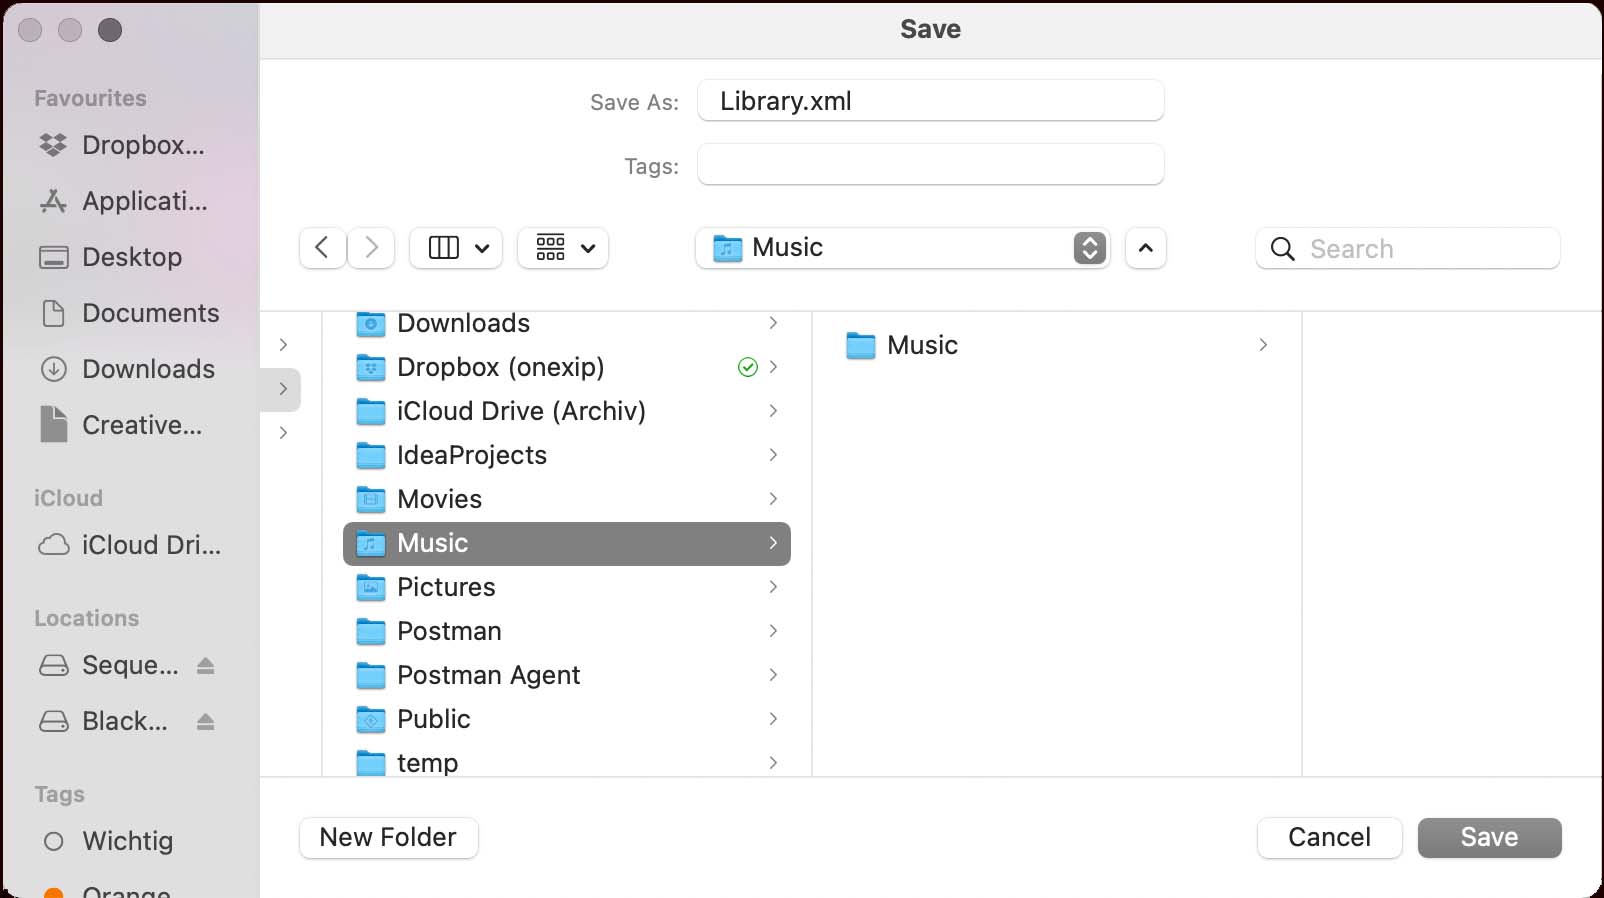
You are using iTunes or the Apple Music App to manage your playlists and titles? In this article you will learn how to import your files and playlists on your Mac into UltraMixer.
ℹ️ Music files purchased on iTunes can be imported, however, files obtained through an Apple Music Subscription cannot be imported due to copyright restrictions set by Apple.
iTunes Software #
ℹ️ Follow these steps for Mac versions earlier than macOS Catalina and the Windows Software.
In the first step, check your iTunes preferences. In the “Advanced” settings, you will have to set the checkmark to „Share iTunes Library XML with other applications“. UltraMixer will then have access to your iTunes Playlists.
Then, open the UltraMixer Settings > FileArchive > Location > Location of iTunes Library File and browse for the iTunes Music Library.xml file. The path should look similar to this:
C:/Users/<UserName>/Music/iTunes/iTunes Music Library.xml
Click “Apply” and ok so close the settings.
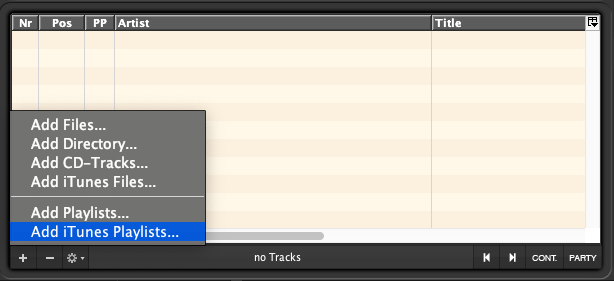
Finally, you can import your iTunes Playlist in the UltraMixer FileArchive by clicking the “+” Button and choosing “Add iTunes Playlist”. Select the playlists you would like to import – that’s it!
Music App #
ℹ️ If you have installed macOS Catalina or later versions, please follow the next steps.


ℹ️ Please remember: If you add new songs to your Music app, you will have to export your whole library and load the files to your UltraMixer FileArchive once more.
Import libraries to UltraMixer #
Now you can click the + icon in the FileArchive, Playlists, Wishlist, or Waitlist and add iTunes Files or Playlists. After you chose the files you need and want, UltraMixer will import the titles automatically. Yes, it is that easy.
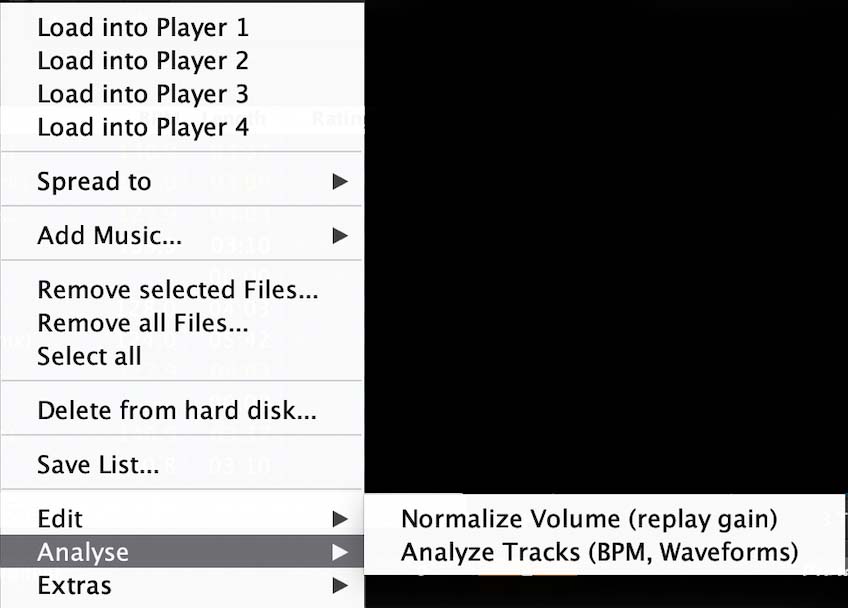
Last but not least we recommend you select all the newly added titles in your playlist and, by clicking with the right button of the mouse and selecting both adjustments in the „Analyse“ field, analyze the titles and normalize the volume.


